Testing
Once a memory map has been created in test, it is ready to be tested directly with a tool.
To use a memory map that is in the Test stage follow these steps
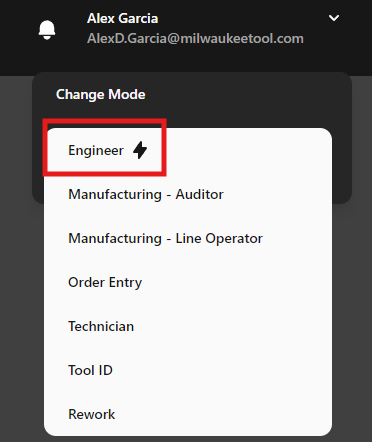
Step 1: Select Engineering Mode
Step 2: Connect to tool
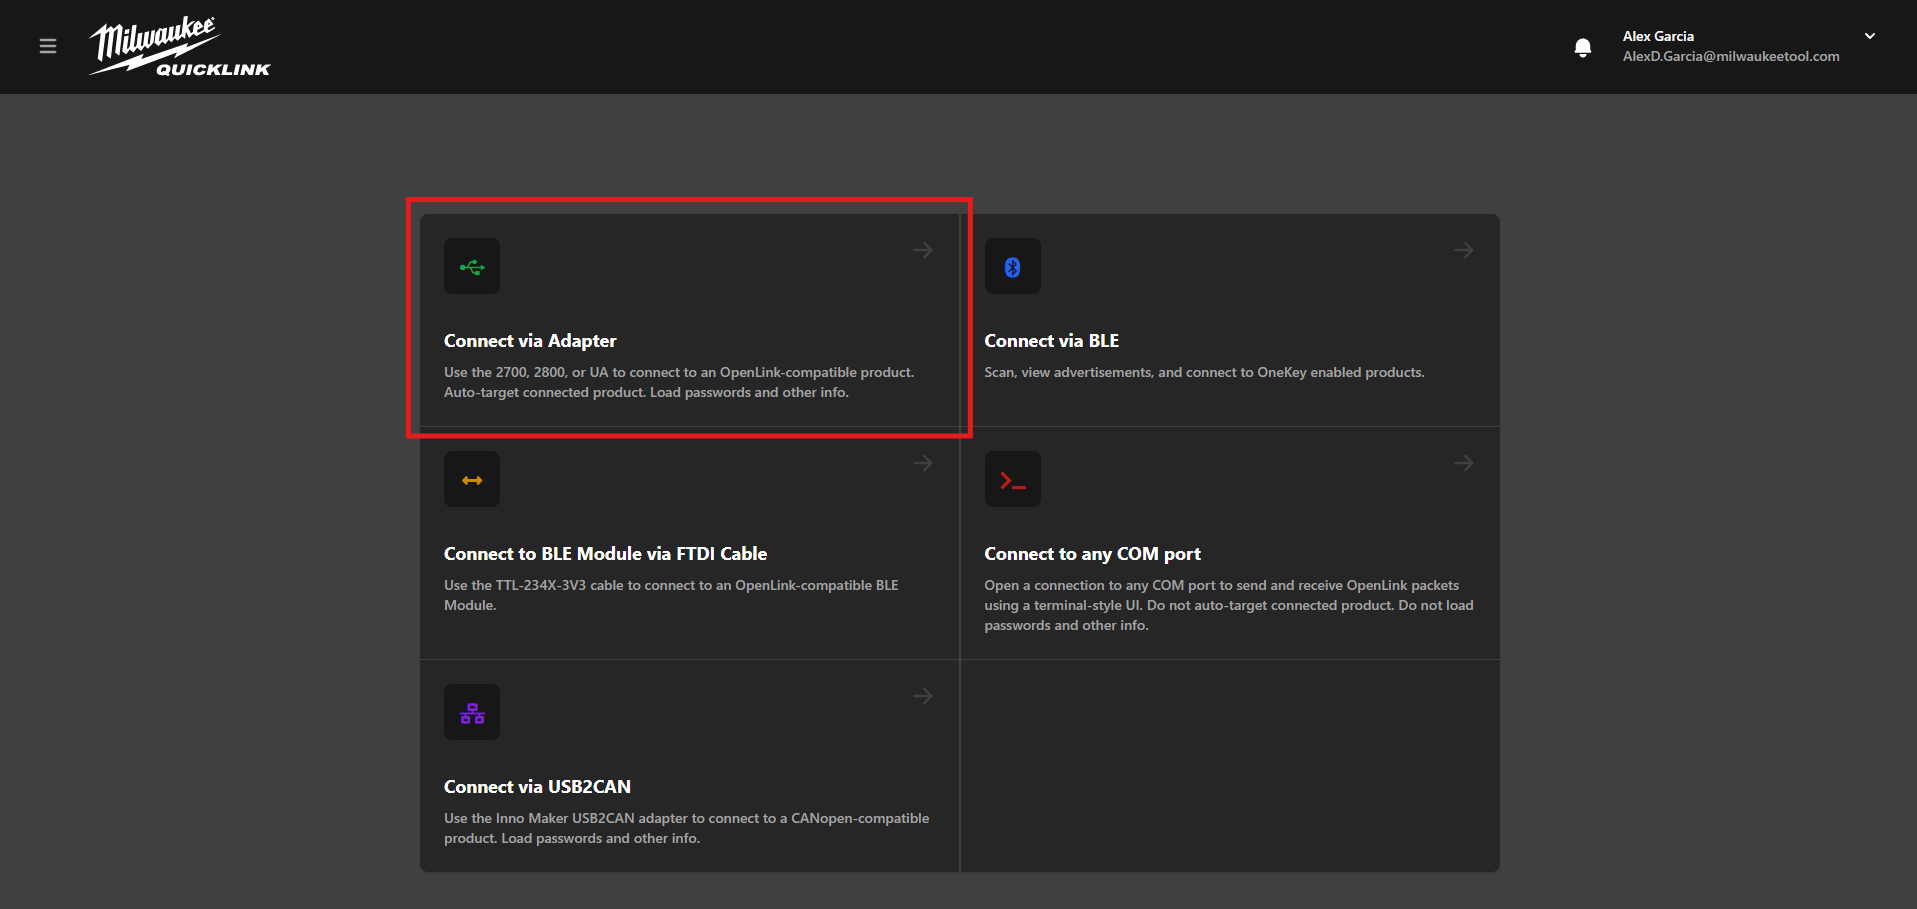
From the connect to screen select "Connect via Adapter" and wait to the tool to be loaded
Step 3: Data Read
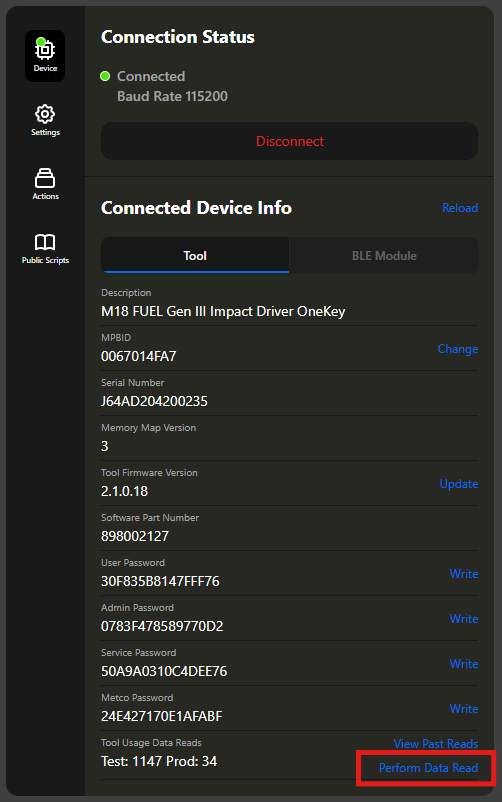
In the "Connected Device Info", navigate to the "Tool Usage Reads" section. Click on "Perform Data Read" to initiate the process.
Step 4: Select Memory Map Version
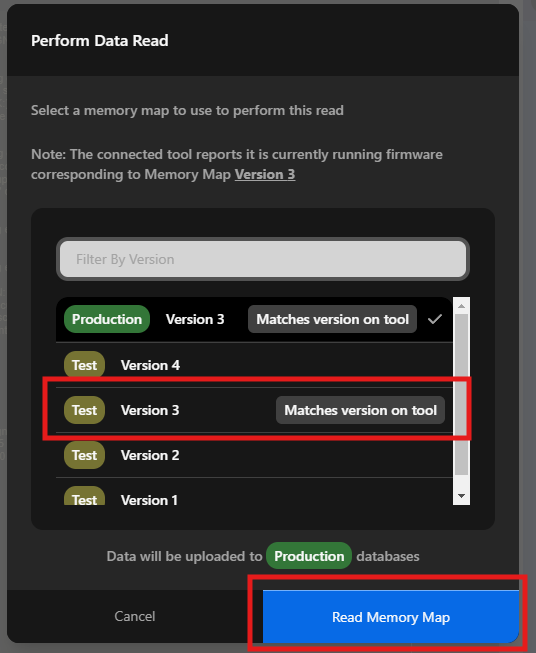
A prompt will appear asking you to select the memory map version for the read. The application will suggest a version based on the tool's stored data.
- Data reads using the Test version will be uploaded with the Test tag.
Step 5: Navigate to Data Read
After the memory read is complete, click on "View Past Reads" to go to the specific Tool Detail.
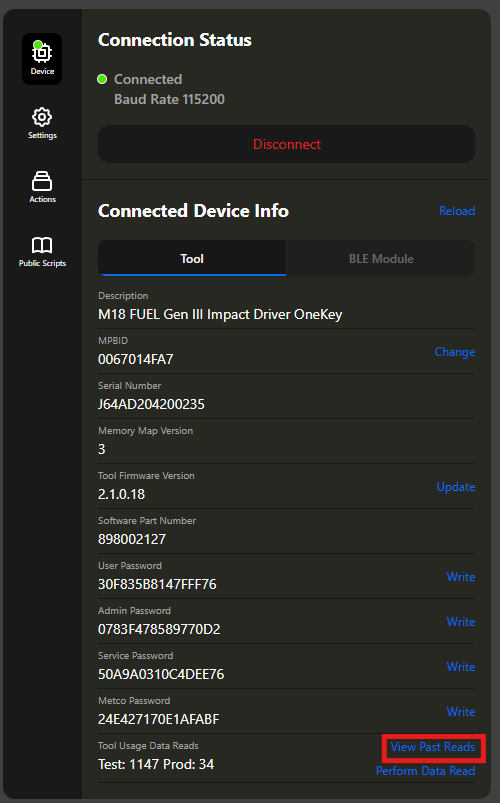
Step 6: View Data Read
Wait for the page to load, then select the data read entry that corresponds with the time, username, and environment where the data read was performed. Click on the row to view the details.
If the entry is not present wait 30 seconds and refresh
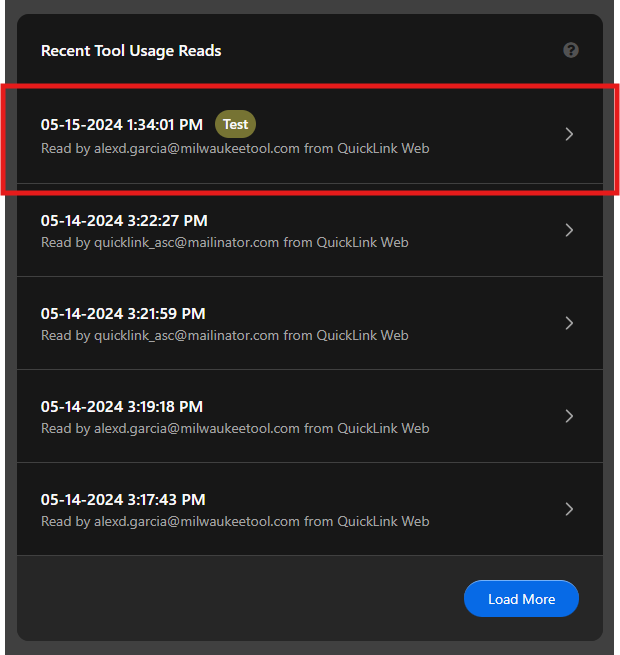
Step 7: View and Edit Tags
Once you've opened a data read, you can view the tags associated with it. Tags help organize and categorize your data reads.
- System Generated Tags: Automatically created tags like
ENVIRONMENT: Testindicating this was a test read - User Assigned Tags: Custom tags you can add to categorize the read
Users with the Engineering role can click Edit/Assign to add or modify user-assigned tags.
For more information about tags, see the Tags documentation.